
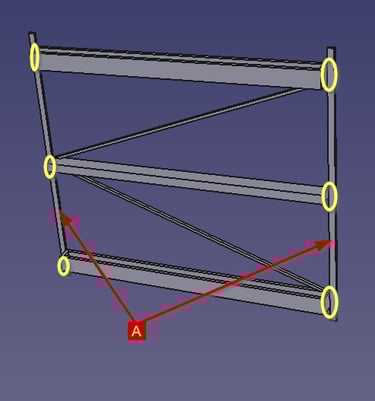
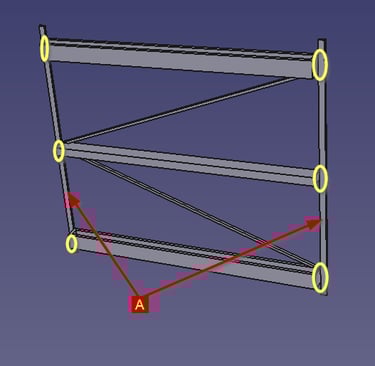
The rear panel
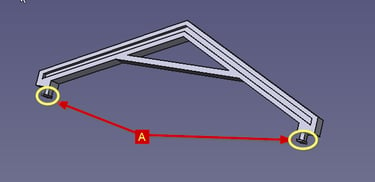
The roof trusses

Preparation
Steel Framed Building Extension Kit
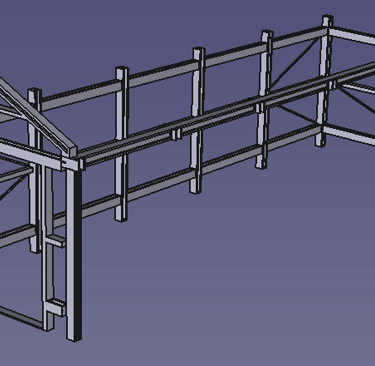
One or more extension kits may be used in conjunction with the complete building kit (all sold separately) to extend the building width by as many units as needed.
These kits have been designed in such a way as to be modular and relatively easy to prepare and construct. Ample glueing surfaces and tab locators will help you piece this all together...
Only the rear panel and all of the roof trusses require attention prior to fitment.
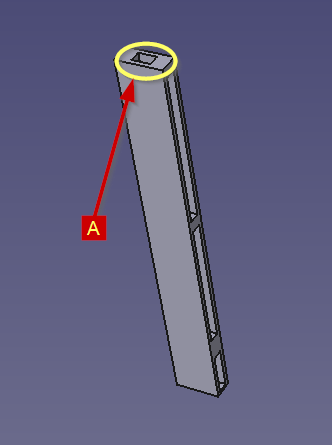
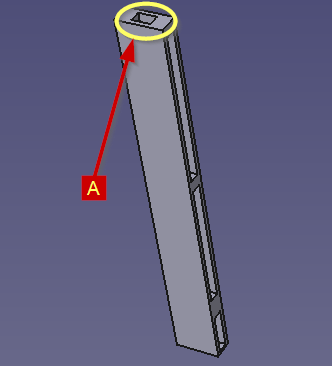
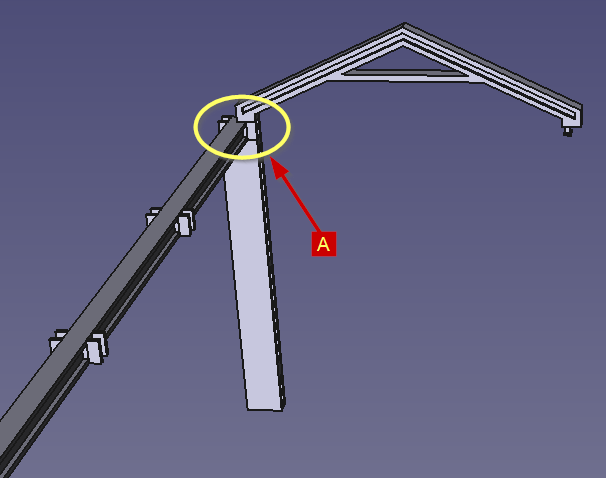
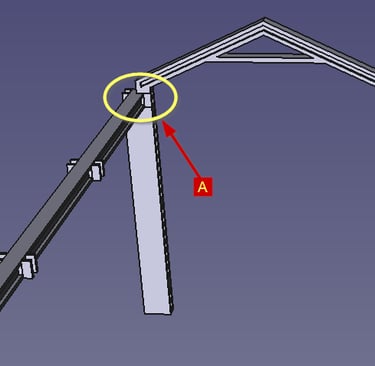
The two side bars (A) require detaching at the points circled in yellow. Using a scalpel cut along tight up against the horizontal bars to leave a clean flat surface.
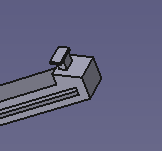
There are two tabs on the bottom of each roof truss. On each tab there is a small vertical piece that must be removed so that it can slide into the receiving parts.
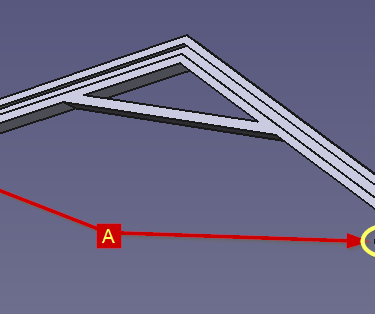
Use a scalpel to remove each of the vertical pieces

From this
To this
The side panel
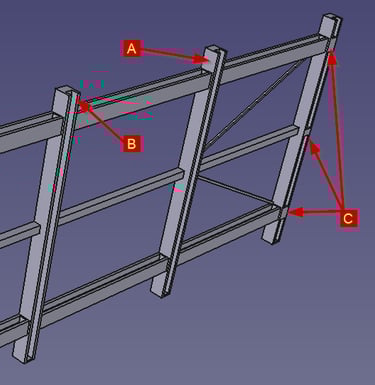
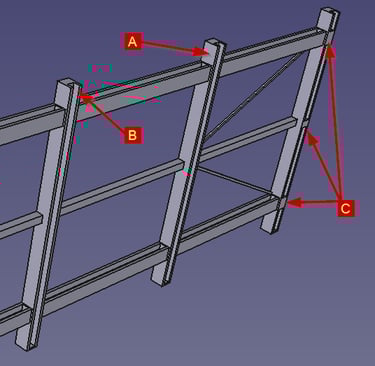
This view shows the panel that will be inside the building; noting that the shorter part of the uprights (A) is to the top, the recess for the roof truss (B) and the front and rear panel pads (C) are facing inwards .
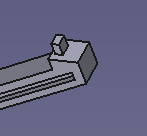
The intermediate roof beam upright
This part provides support to the intermediate roof beam for both front and rear. The roof beam has tabs that locate into (A).
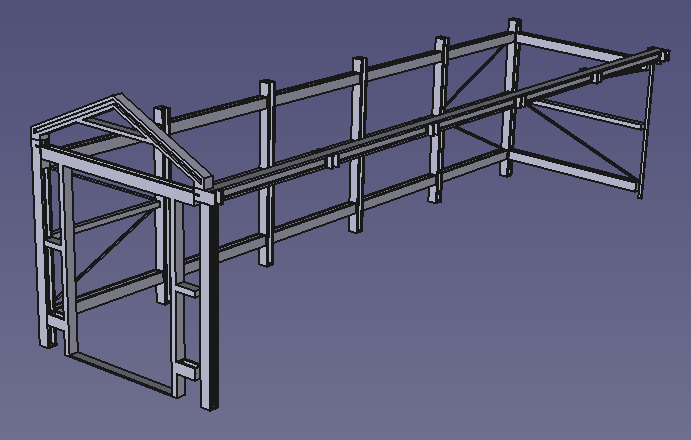
From the picture below you can see that (A) shows the junction between the intermediate roof beam, the front/rear upright and a roof truss.
💡
If you wish to show the building under, yet to be completed construction, you could remove various portions of the panels, say some railing from the side/rear panels, or the thin cross bracing. It might be easier to remove any pieces before glueing, but it can be done afterwards with care. Just use a scalpel to cut through the plastic. Perhaps miss out some roof truesses too.
The anchor plates
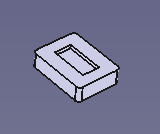
The pad stones

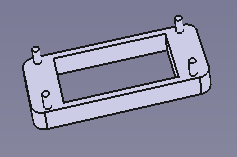

Note some features - their orientation and purpose
Build Instructions
Start by fitting two roof trusses (F), one at each end. Apply glue to the four points on the sides (A) where trusses will make contact. Place the trusses making sure things are nice and square with the sides in the upright position. Leave to set before proceeding.
Now fit the front section (A) by applying glue to the 6 points that the front section will make contact with the side panels. With the frame standing on end, fit the front section in place, making sure things are square and that the bottom aligns with the bottom of the sides. Again leave to set before proceeding.
Now fit the rear section (B), this is achieved in the same manner as with the front section.
Fit the remaining roof trusses.
Fit the roof truss cross bracing. Starting with the centre one, apply glue in the slots where the bracing will make contact with the trusses. Now slide the brace in the centre of the A of the truss and position in place. Again leave to set before proceeding with the next until all three are in place.
Glue the anchor plates to the bottom of each upright. If you are also making use of the padstones the anchor plates will need to be raised up a liitle
If fitting the padstones, just apply a little glue to the recess and place on the end of each upright, the anchor plate should them be pushed flush to the top of the padstone.
The Base Kit
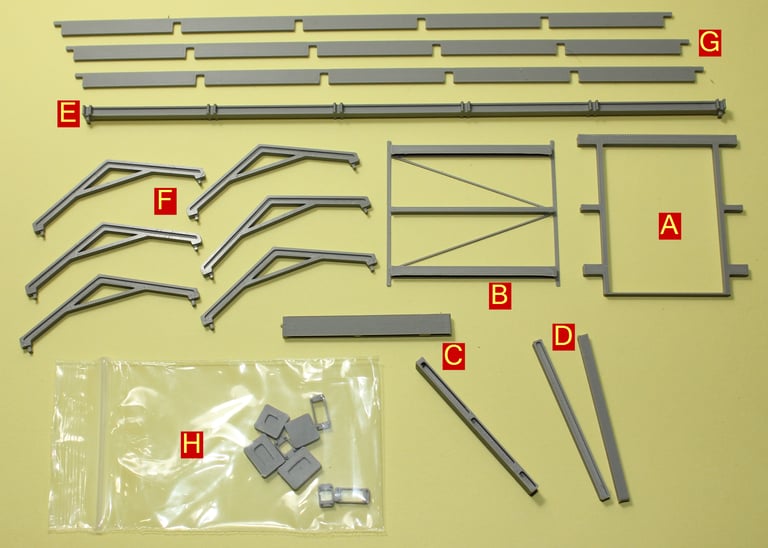
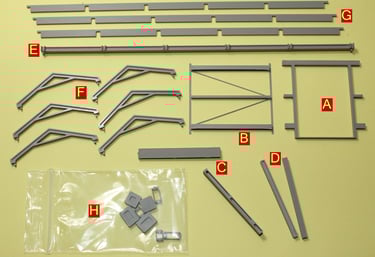
The Extension Kit
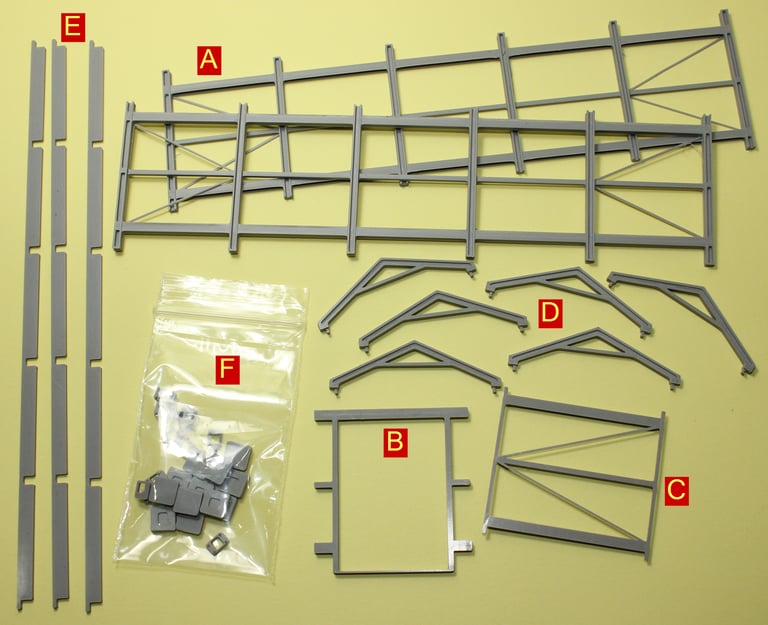
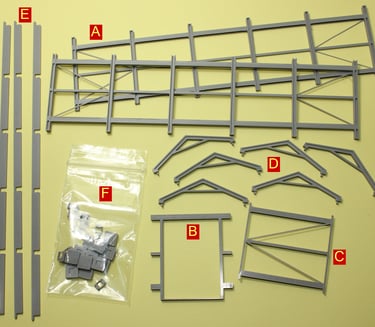
A - Side panels
B - Front door panel
C - Rear panel
D - Roof A-frame trusses
E - Roof connecting beams
F - Pad stones and anchor plates
A - Front door panel
B - Rear panel
C - Front and rear uprights
D - Interconnecting roof beam internal support uprights
E - Interconnecting roof beam
F - Roof A-frame trusses
G - Roof connecting beams
H - Pad stones and anchor plates
These slide on the bottom of each upright. Note that the side and intermediate uprights are not square, so make sure to get them on right and the correct way up, the tops have studs on to mimic anchor bolts.
You may choose to discard these, the choice is yours and it depends really on what stage of building construction you wish to mimic. If you do use them, there is one for each upright and they will rest in the small pad stone recesses.
APB Creative Minds - 3D printed and laser cut creations
info@apbcreativeminds.com
©2024-2026. All rights reserved.